
Written by
Anna Yuan
Fix The Disk You Inserted Was Not Readable by This Computer on Mac
Summary: Here you'll find 8 efficient methods to fix the disk not readable on Mac issue.
Note that the unreadable disk usually means your data is in danger. To avoid data loss, please use iBoysoft Data Recovery for Mac to save your data.

Many Mac users are experiencing "The disk you inserted was not readable by this computer" error when connecting an external hard drive, SD card, or USB flash drive to their Macs with Catalina, Mojave, or High Sierra installed. It seems that this disk unreadable error could also occur on macOS 13 Ventura, macOS 12 Monterey, or macOS 11 Big Sur.
Some affected users report the issue occurs with every external drive. While others say this unreadable disk error only appears with one external drive. If you're the one who encountered the disk not readable error, then, you've come to the right place. In this post, we give 8 feasible methods to fix the disk unreadable error on Mac. Just keep reading.
Table of Contents:
- 1. The disk you inserted was not readable by this computer, what is it
- 2. How to fix The disk you inserted is not readable by this computer on Mac
- 3. Why does Mac say The disk you inserted was not readable by this computer
- 4. How to avoid disk not readable error again
- 5. FAQs about The disk you attached was not readable by this computer
The disk you inserted was not readable by this computer, what is it
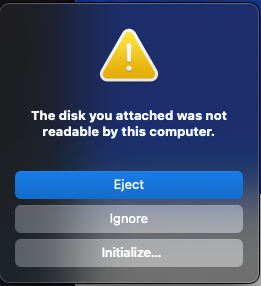
If you're using macOS Ventura, Monterey, or Big Sur when you connect an external drive, an SD card, or a pen drive to your Mac computer, an error message pops up: The disk you attached was not readable by this computer. As a result, you can't access the files on this storage device, and this pop-up only offers you 3 options: Eject, Ignore, and Initialize.
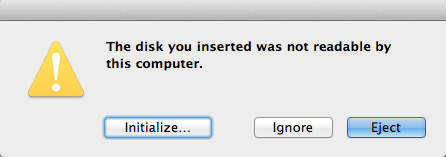
While if you're using a Mac computer installing Catalina, Mojave, or High Sierra, the non-readable error message is slightly different. It will display: The disk you inserted was not readable by this computer.
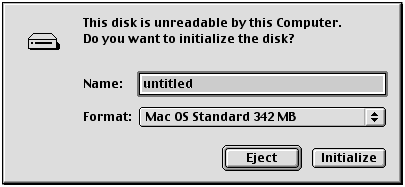
Most of the time, this issue happens on macOS, but it also occurs on Mac OS X with this message - The disk is unreadable by this computer, do you want to initialize the disk?
No matter whether you're facing The disk you attached was not readable by this computer or The disk you inserted was not readable by this computer, you can try the below fixes to repair the unreadable USB on Mac.
How to fix The disk you inserted is not readable by this computer on Mac
Here we offer 8 methods to fix The disk you inserted that is not readable by this computer issue on your Mac, you can try them one by one until the unreadable problem has been fixed.
- Method 1: Do a basic troubleshooting
- Method 2: Re-insert the external hard drive
- Method 3: Update the drivers on your Mac
- Method 4: Run first aid to fix the unreadable disk
- Method 5: Repair the unreadable disk by data recovery
- Method 6: Initialize the disk to repair the unreadable disk
- Method 7: Ask a professional for Help
- Method 8: Consider a replacement
Firstly, you can watch this video tutorial to learn how to fix an unreadable disk on macOS Ventura. But If you can't catch the steps in this video, just keep finishing reading the next part of this article.
Fix 1: Do a basic troubleshooting
There are six methods to do basic troubleshooting and determine if the unreadable disk (External hard drive, SD card, USB drive, flash drive, etc.) has a problem:
Check if the disk is encrypted
If you receive the disk not readable error after inserting an encrypted drive, you need to open this drive with the corresponding app.
For example, if the disk is encrypted by BitLocker, macOS also reports "The disk you inserted is not readable by this computer" without BitLocker for Mac tool installed. In this case, try iBoysoft BitLocker for Mac to access the BitLocker encrypted drive on Mac.
Check if the file system is not supported by macOS
Check the file system of the external drive to see if the file system is supported by macOS. If macOS isn't compatible with this file system, the disk you inserted is not readable by this Mac. For example, the ReFS file system is not supported by macOS.
Check if the disk is a new hard drive
If it is a new hard drive, click the "Initialize" button to initialize this drive after seeing the unreadable disk error. After initializing it, this new hard drive will be working.
Check the disk on another computer
Plug this unreadable disk into another computer (Windows or Mac) and check if it can be readable. If this error continues, try other solutions as below.
Change the USB cable and USB port
Sometimes, a USB cable or USB port is something wrong so that the disk you inserted is not readable by this computer. In this case, change another USB cable or USB port and try again.
Reset USB port
If you're confident the USB port is a problem and not the device itself, the first thing you should do is reset System Management Controller (SMC). It is a simple process that is slightly different depending on the Mac hardware.
Fix 2: Re-insert the external hard drive
You can try simply reconnecting the external storage device to your Mac. Just safely remove it from your Mac and then re-plug it. Then, attempt to access it and see if the disk you attached is not readable by this computer on Mac, still. If this error still occurs, please move on and try the following solutions.
Fix 3: Update the drivers on your Mac
'The disk you attached is not readable by this computer' can also be caused due to an outdated driver on your Mac. You can check the drivers on your Mac and update them via the following steps:
- Go to the Apple menu and select System Preferences.
- Click Software Update.
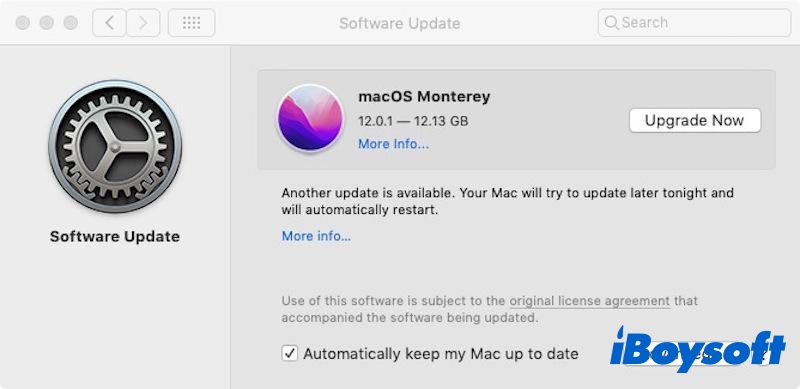
- Check for any available updates for your system and applications.
Fix 4: Run First Aid to fix the unreadable disk
Some Mac users have reported that 'the disk you inserted is not readable by this computer on Mac' can be resolved by Disk Utility First Aid. Though it's not 100% workable, you can't still have a try.
First Aid is a built-in utility in the Mac operating system. It can check and repair file system errors on Macintosh HD, external hard drives, USB drives, flash drives, SD cards, etc.
Steps to fix the unreadable disk with First Aid:
- When the initial prompt message "The disk you inserted was not readable by this computer" appears, click Ignore to dismiss it.
- Once the error has been dismissed, open Applications > Utilities > Disk Utility.
If Macintosh HD is not readable, please run First Aid from Mac recovery mode. Restart your Mac and press & hold down the Command + R keys at startup, then select Disk Utility from the macOS Utilities panel. - In the left panel of Disk Utility, select the unreadable disk.
- Click the First Aid button in the toolbar of Disk Utility.

- Click the Run button, First Aid will check the volume for errors and then fix the problem on the unreadable disk if possible.
Wait until the procedure is complete. If you get returned a message saying success, restart your Mac and see if the disk becomes readable.
If another message says that the disk utility cannot repair the unreadable disk, try solution 5 to recover the data.
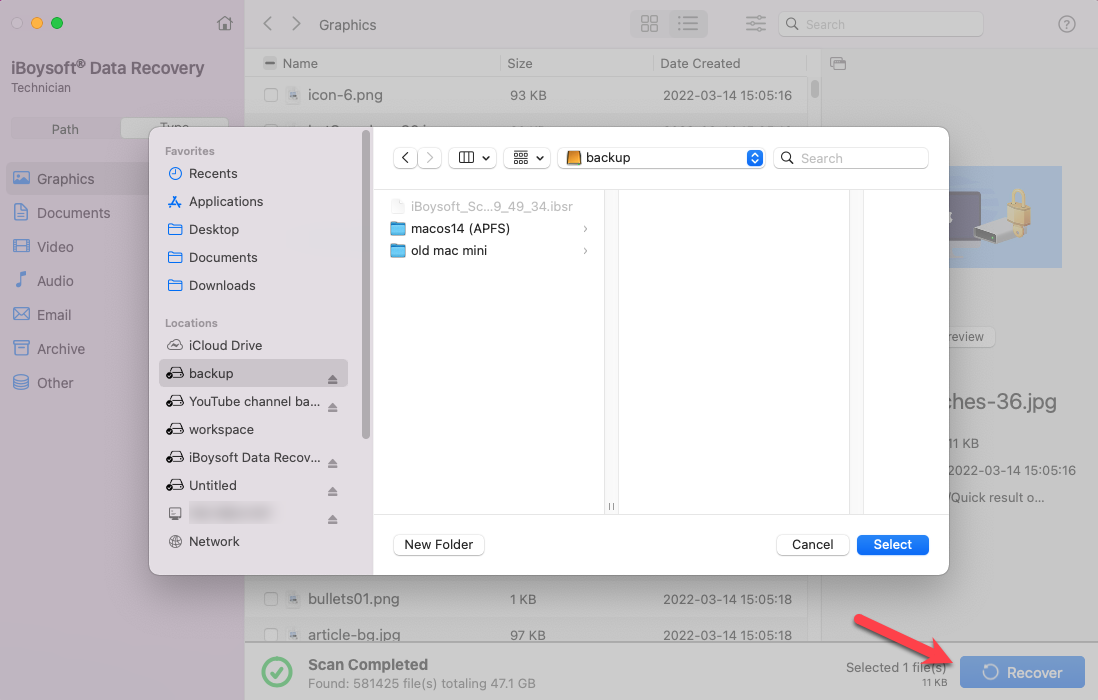
Fix 5: Repair the unreadable disk by data recovery
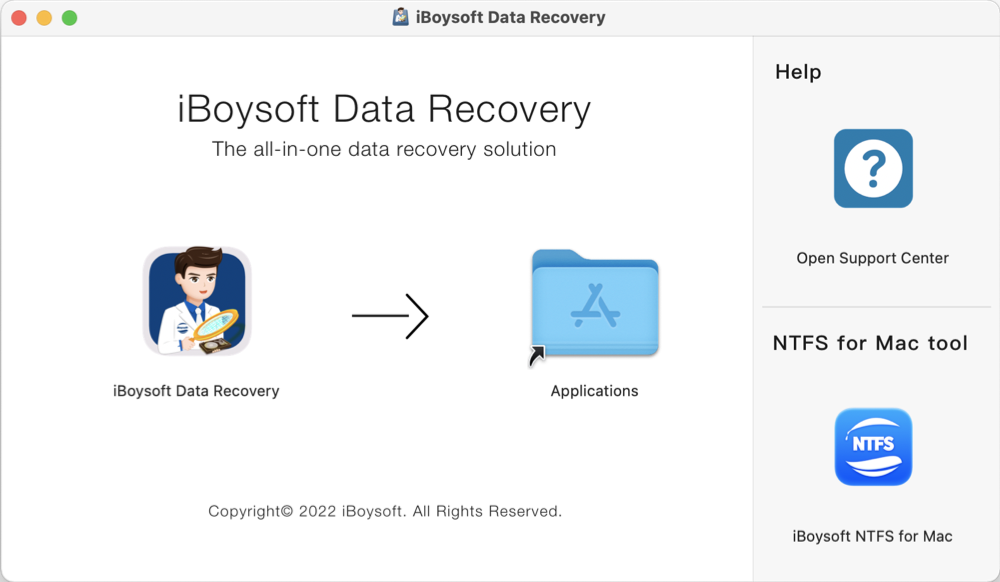
When macOS fails to read the disk, to access the data on this external storage device, you can restore your data from the backup if you have a backup elsewhere. If you do not have a backup, you need professional Mac data recovery software to recover data, such as iBoysoft Data Recovery for Mac.
As a professional Mac data recovery software, iBoysoft Data Recovery for Mac can recover files from the unreadable drive, and formatted drives, even recover deleted files on Mac emptied from Trash, recover data from deleted/lost APFS partitions, etc.
iBoysoft Data Recovery for Mac is fully compatible with macOS 13 Ventura/macOS 12 Monterey/macOS 11 Big Sur /macOS 10.15 Catalina/macOS 10.14 Mojave /macOS 10.13 High Sierra /macOS 10.12 Sierra and Mac OS X 10.11 and works fine on M2, M1, M1 Pro, and M1 Max Mac.
Tutorial to recover data from the unreadable disk on Mac:
- Download, install and launch iBoysoft Data Recovery for Mac software on your Mac.
- Connect the unreadable external disk to your Mac, select it from the list in the user interface, and click the Search for Lost Data button to start scanning.
- Wait until the scan process is completed. While the process is ongoing, you are allowed to pause/stop it and perform recovery at any time. But for the best recovery result, we highly recommend you wait for the completion of the whole process.
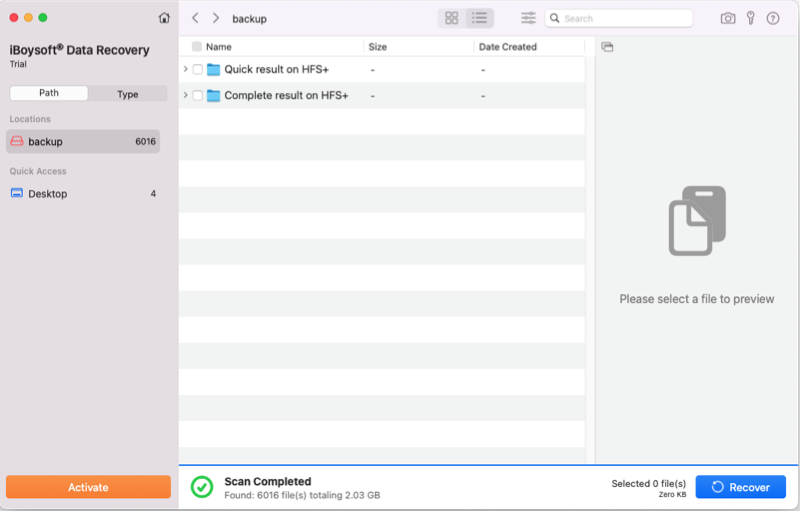
- After the scan completes, you can sort or filter found files by different parameters if necessary, and click the Preview button to check if your wanted files are corrupted.
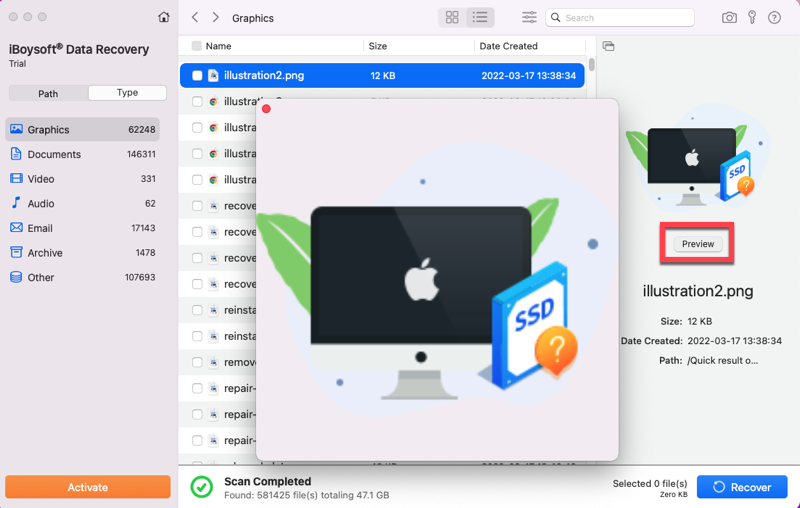
- Select the files or folders you want to recover from your unreadable external disk, then click the Recover button to restore them. You can't save them back to the malfunctioning external disk, save them to either Mac internal disk or another external storage device.
Fix 6: Initialize the disk to repair the unreadable disk
After data recovery is successfully done, it is time to erase this disk to repair the disk not readable error on macOS Ventura.
Steps to repair the unreadable disk by initializing:
- When the initial prompt message 'The disk you inserted was not readable by this computer' appears, click Initialize to open the Disk Utility.
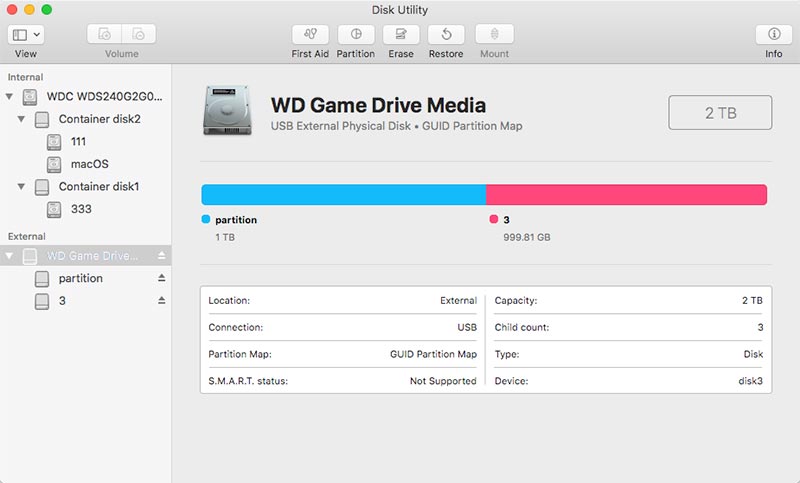
- Once Disk Utility is open, from the menu bar, click View > Show All Devices, and you will see a list of drives attached to the system. Select the problematic disk you wish to initialize.
- Click on the Erase tab on the top.
- Name the drive, select a file format, and partition scheme. Click Erase once again. This will format your drive with the correct file system.
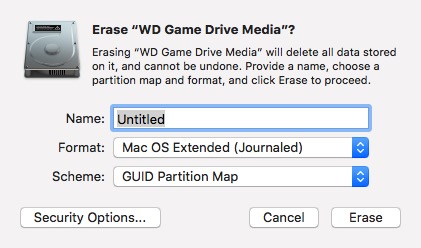
After the formatting process is complete, you can access this disk as normal.
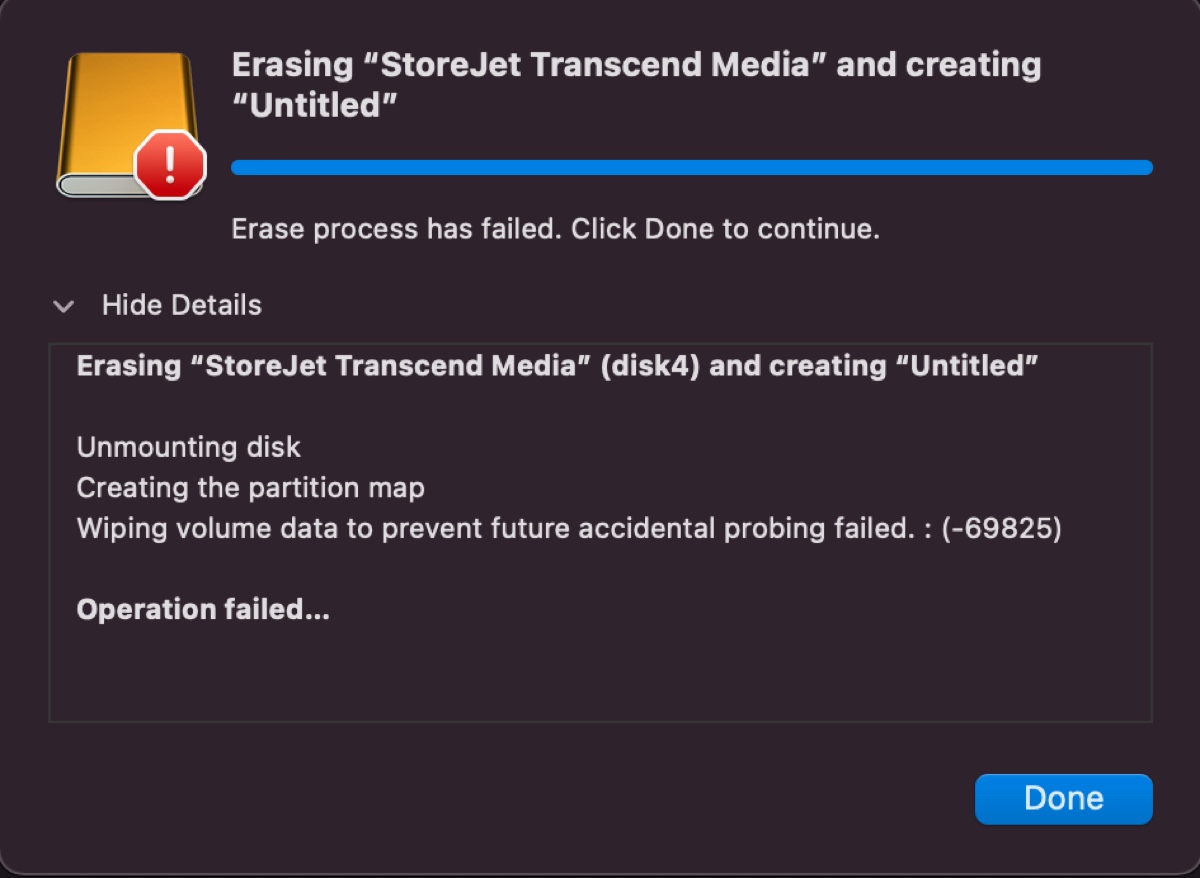
If the error "Wiping volume data to prevent future accidental probing failed" pops up when you're trying to format the drive, keep reading this article to figure out the solutions.
Fix 7: Ask a professional for Help
Nevertheless, some users may worry that their own improper operations will make further damage to their hard drives. In this scenario, you'd better take it to a local professional. They could give you some correct suggestions to get rid of this error.
Fix 8: Consider a replacement
If you don't need the data and the drive is still within warranty, you will want to have the drive replaced or ask for a refund.
Why does Mac say The disk you inserted was not readable by this computer
Many reasons could cause the disk you inserted unreadable by your Mac computer. Namely, they're:
- Virus infection
- Hardware issue
- The disk is not formatted
- Catalog file corruption
- The disk structure is corrupted
- The system files are corrupted
- The file system format of the disk is not supported by macOS
- Disconnecting or powering off the drive without unmounting it
- Experiencing a software lockup while writing to the drive
- Turning the computer off without doing a proper shutdown
- Disk failure - It is possible that either the disk itself or just its USB interface has failed. In this case, a data recovery solution is advisable.
How to avoid the disk not readable error again
1. Eject the external drive properly
The external drive is easily corrupted if you eject the external drive improperly. If you remove an external drive from the computer when being in use, it can also be corrupted. So you must safely remove your external drive from the Mac by clicking the "Safely Remove Hardware" option.
2. Back up important data
Data backup is the best way to prevent data loss. Time Machine is a macOS built-in data backup software that can automatically back up all of your files.
3. Use an advanced file system
If you have a choice, please adopt the NTFS (APFS, HFS+) file system instead of the FAT32/exFAT file system. NTFS file system gives you more flexibility in the length of filenames and directories, and security control. What's more, you can stand a greater chance of data recovery in case of drive corruption.
Related posts:
FAQs about The disk you attached was not readable by this computer
A
If the drive becomes unreadable on your Mac, you can first check whether the hard drive can work normally on other computers. Then, you can see whether there is something wrong with the USB port. If everything is OK, you can try running First Aid on Mac or erasing the drive to see whether it can work normally again.
A
To fix a corrupted hard drive on Mac, try to use the Disk Utility First Aid function. If the drive is corrupted seriously and Disk Utility First Aid failed to repair it, you can use the fsck command in Mac Single User Mode to perform the repair.
A
Your external hard drive is not readable on Mac because its file system is not supported by macOS. A loosely connected or frayed USB cable can cause the external drive not to recognized by your Mac. Virus or Malware infection is also a possible reason.