
Written by
Amanda Wong
[Tutorial]How to Format NTFS on Mac
Summary: Windows NTFS file system is not supported by macOS. To get full read and write access to the NTFS drive on Mac, you can format it as APFS, HFS+, and FAT32. In addition, you can also use NTFS drive on Mac without formatting.
NTFS(New Technology File System) is a proprietary journaling file system developed by Microsoft and applied to Windows operating system. Given that Windows OS is the most widely used OS, many SSDs, HDDs, and USBs are formatted with NTFS format when they leave the factory to be compatible with the Windows system.
However, Mac users could encounter some issues when they got an NTFS drive to use on macOS. Unlike other HFS+ drives, APFS volumes, etc., when you connect an NTFS drive to the Mac computer, you can only read NTFS on Mac but can not write NTFS, like copy files to an NTFS drive on Mac, or delete files from an external hard drive on Mac.
Apple gives limited support to the NTFS format to use on macOS 13 Ventura, the same as the previous macOS versions, you can only have read permission but not write permission.
To get rid of such an incompatibility problem between the NTFS format and macOS, many Mac users choose to format NTFS on Mac and assign the drive with a macOS-support file system such as exFAT, FAT32, HFS+, and APFS. Here, we are going to guide you on how to format NTFS on Mac step by step.
Table of Contents:
- 1. How to use NTFS drive on Mac without formatting
- 2. How to format NTFS to APFS
- 3. How to format NTFS to HFS+
- 4. How to format NTFS to FAT32/exFAT
Share this post with people troubled with the same problem.
How to use NTFS drive on Mac without formatting
Actually, formatting NTFS is not the only solution to using NTFS drive on Mac. Although you can format NTFS on Mac without losing data if you have backed up the drive in advance on a Windows PC, it could be inconvenient if you need to switch between macOS and Windows. There is a way out of this issue that is using a third-party NTFS for Mac tool.
Using the NTFS for Mac tool, you don't need to format the NTFS drive on Mac so that you will not lose any data on it. And you can straightforwardly access the NTFS drive on Mac with full read and write permissions. Among these NTFS drivers for Mac, we highly recommend iBoysoft NTFS for Mac, the best NTFS for Mac solution.
Best NTFS for Mac by iBoysoft
With your NTFS drive connected to your Mac, iBoysoft NTFS for Mac can automatically mount the drive in read-write mode. It enables you to freely view the files contained, delete, edit, rename, and write files on the NTFS drive without any limitations. There are only a few steps away from using NTFS drive on Mac without formatting.
There is a video tutorial on how to read and write NTFS drive on Mac with iBoysoft NTFS for Mac.
Steps to read and write to NTFS on Mac:
- Download and install iBoysoft NTFS for Mac on Mac.
- Connect your NTFS drive to your Mac computer.
- Freely access the auto-mounted NTFS disk on Mac and read/write NTFS files.

In addition to using professional NTFS for Mac software, you can also use sudo command via Terminal (except for macOS Ventura ). But it is a little complicated to gain NTFS write support using Terminal on Mac and it poses a risk of damaging the drive. You should be very cautious during the process. You can get the detailed steps by reading How to Read and Write NTFS Drives on Mac Without Formatting?
You can recommend iBoysoft NTFS for Mac for whom needs to use NTFS drive on both macOS and Windows.
How to format NTFS to APFS
With Disk Utility, the built-in disk manager on Mac, you can easily manage both internal hard drives and connected external hard drives. It enables you to run First Aid to repair disks, add or delete an APFS volume, erase or format a volume, mount or unmount a drive, etc.
You should know that formatting the NTFS drive will erase all the data stored on it. If the drive is in use and you have kept some important files on it, you should create a backup of the drive using a Windows PC. Then you can proceed to format NTFS to APFS with the following steps.
- Open Disk Utility by heading to Finder > Applications > Utilities.
- Click the View button and choose Show All Devices.
- Select the NTFS drive you attempt to format on the left.
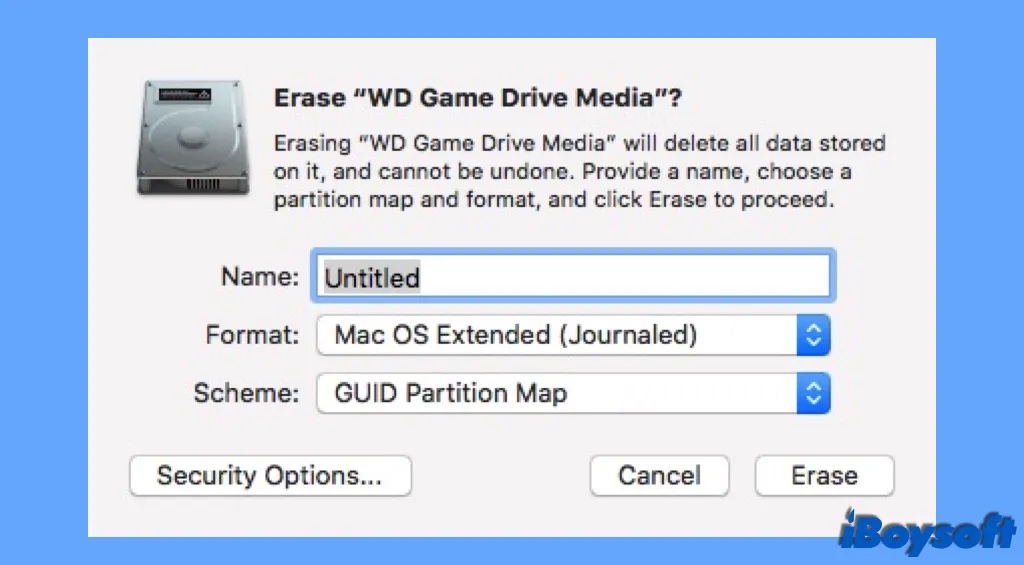
- Tap on the Erase button on the top of the Disk Utility window.
- Name the drive as you prefer and choose an APFS format.
- Click Erase again to start the formatting process.
How to format NTFS to HFS+
If your Mac is running macOS 10.12 or earlier, you can format NTFS to HFS+ instead of APFS for compatibility. Or, you need the previous Mac OS Extended file system to use some applications that are only compatible with HFS+, etc. Whatever the reason, you can format the NTFS drive to HFS+ on Mac.
- Launch Disk Utility by using the Spotlight Search.
- Tap View on the upper left corner and choose Show All Devices.
- Locate and choose the NTFS drive from all devices listed on the left.
- Choose Erase on the top of the Disk Utility window.
- Assign a name to the drive and choose the format as Mac OS Extended(Journaled).
- Choose Erase to format NTFS to HFS+.
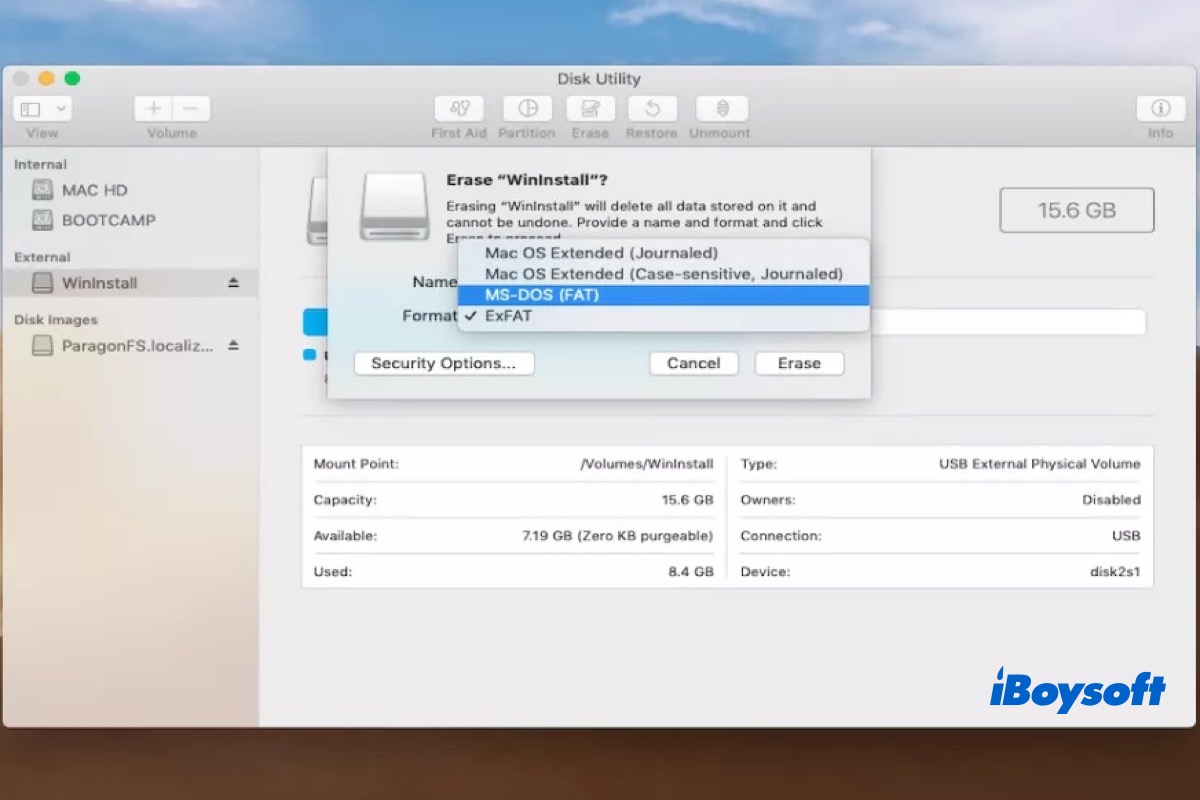
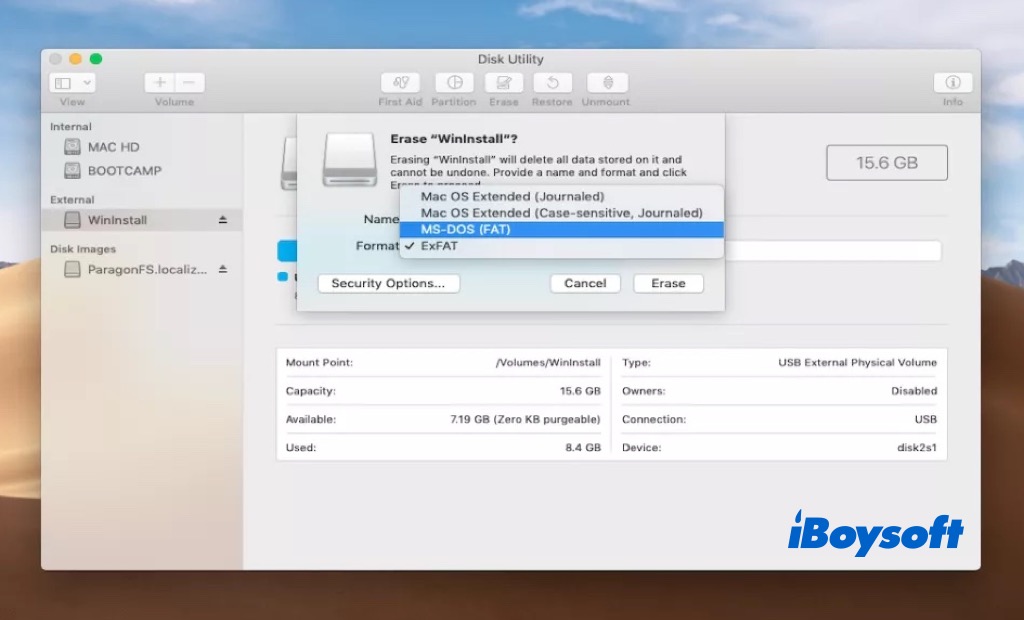
How to format NTFS to FAT32/exFAT
Both APFS and HFS+ are exclusive to macOS. That is to say, once you format the NTFS drive to APFS or HFS+, you can not read and write the drive on a Windows PC. If you want to share files between Mac and Windows PC using the same drive, you can format NTFS to FAT32 or exFAT to make it compatible with both macOS and Windows.
Similarly, you can directly format NTFS to FAT32 or exFAT in Disk Utility, just choose the format as FAT32 or exFAT on the pop-up window. Once the process completes, you can use the FAT32/exFAT-formatted drive on both Mac and Windows PC.
Can't format NTFS-formatted USB to FAT32/exFAT on Mac? You can try to use the Terminal command to convert NTFS to FAT32 on Mac.
- Connect the NTFS USB drive to your Mac.
- Open and run Terminal from Finder > Applications > Utilities.
- Enter command diskutil to locate the USB drive.
- Run the command diskutil erase Disk FAT32 MBR Format /dev/disk2. (Replace disk2 with the correct disk name and identifier).
If the steps above help to format NTFS on Mac, you can share it with more people!
Conclusion
NTFS format is incompatible with macOS, and you can use Disk Utility to format NTFS to APFS/HFS+ and convert NTFS to FAT32/exFAT so that you can read and write the NTFS drive on Mac. But you will lose all the data on the formatted NTFS drive. Besides, you can use the NTFS drive on Mac without formatting using iBoysoft NTFS for Mac if you need to use the NTFS drive on both macOS and Windows. It allows accessing the NTFS drive on Mac without limitations.