Home > Questions

Tuxera NTFS for Mac Needs Kernel Extension, How to Allow It?

I downloaded Tuxera NTFS for Mac but couldn't use it. A message alerts: Kernel extension needs approval. So, how to allow Tuxera NTFS kernel extension?

Best Answered by

iBoysoft author Connie Yang

Connie Yang

Answered on Monday, July 10, 2023

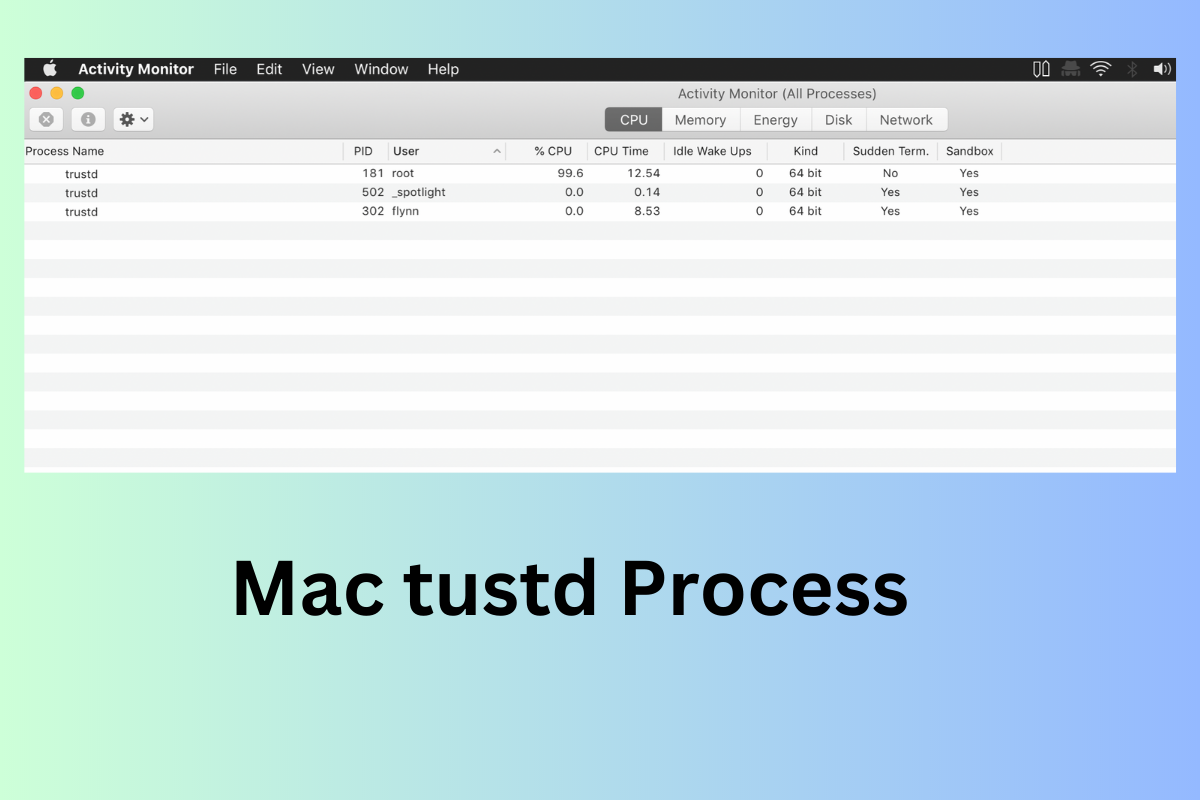
It is simple to allow the kernel extension of Tuxera NTFS for Mac. You can click Open Security preferences on the popup window which appears the time you finish installing Tuxera NTFS for Mac.

If you've ignored enabling Tuxera NTFS at that time, you can try these steps to allow the kernel extension of Tuxera NTFS for Mac.

  1. Click on the Apple menu > System Preferences.
  2. Open Security & Privacy.
  3. Under the General section, click the bottom lock icon and enter your admin password to unlock for changes.
  4. Click the Allow button next to System software from developer "Tuxera Inc." was blocked from loading.

By the way, Tuxera NTFS is hard to completely uninstall from your Mac. If you need to use an NTFS for Mac to read and write NTFS drives on your Mac, iBoysoft NTFS for Mac is the best alternative. This NTFS for Mac tool supports auto-mount NTFS drives once they are connected to your Mac. And it is designed with a built-in uninstaller for quick uninstalling.

People Also Ask

Read More Questions

Read More Advice From iBoysoft's Computer Experts

next Apple event

Next Apple Event 2023: Spring, WWDC, or September Event

An overview of the next Apple event and introduces the Spring, WWDC, and September events in 2023, including the time and announcements.

News Tips

trustd process Mac

What is trustd Process on Mac and How to Solve trustd High CPU

What is trustd process in the Activity Monitor on Mac? Read to know how to fix the trustd process taking up high CPU usage.

Wiki Tips

USB ports

USB Port Overview: Differences between USB-A, USB-B & USB-C

About USB ports, including their types, uses, etc. Help tell the differences between USB-A, USB-B, and USB-C and find a suitable USB port for you.

Wiki Tips